The carpet is gone; the carpet padding is gone; the tack strips are gone; two milion staples are gone. The stairs are ready to be made beautiful. Our staircase future feels bright. The only thing more work than spackling two million staple holes was removing two million staple holes. After spackle-fest I got to bust out my Christmas gift for the first time – this bosch orbital sander. I chose it because with my brief research, it has high reviews, a good price, and is pretty for a power tool.
(And there is a chic carrying case for when you are, you know, orbital sanding on the go.)
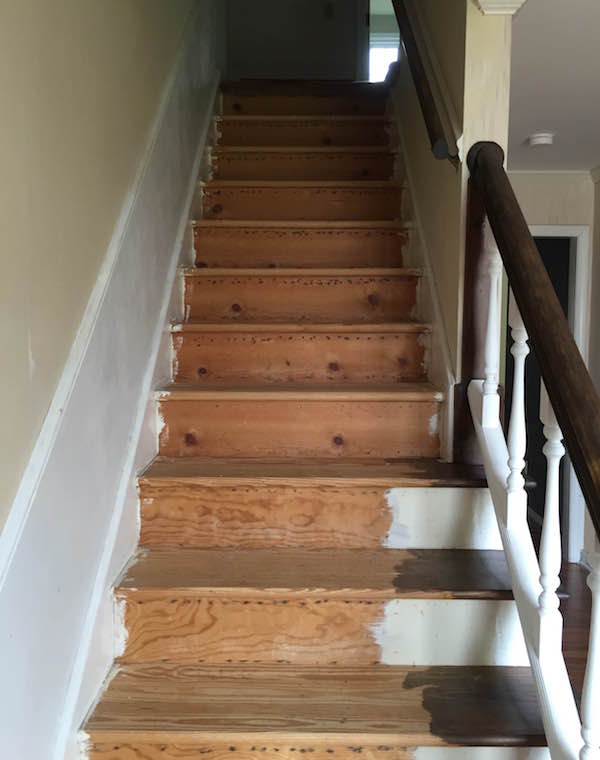

Part I of my refurbishing process is working on the risers and part two will be staining the runs. For the risers, I wanted a smooth, glossy white final surface.
ORBITAL SANDERS FOR PRESIDENT. It blasted through the job really smoothly and getting one with a little trap for the dust made it clean to work with.
One tip for using an orbital sander is that you do not need to push down harder to get the surface smoother. If the material is not getting as smooth as you want you need a higher grit paper. Pressing down on the sander just slows down its orbit.
For this job, I passed over once with a p80 paper and then finished with a p180.
PHASE I IS COMPLETE. Renovation progress, it is a beautiful thing.
You can read the four parts of our stair refurbishing saga here: part i (demo and repair), part ii (stripping the treads), part iii (staining the treads), and part iv (deciding to paint everything, years later).