ZUCCHINI TORTILLAS (NO GRAINS OR DAIRY!)

August 1, 2019

As a friend of mine puts it, I don’t eat desserts, except when I do. I am sort of that way with grains. I dabble in the fruit and vegetable based lifestyle – when I feel like it. Or just when it is fun! Like doing taco night with these tortillas for something new to mix it up. They can be eaten hot or cold too! Just folding in vegetables one dish at a time. But these are good. Like, make-them-even-if-you-don’t-normally-do-grain-free level of good.

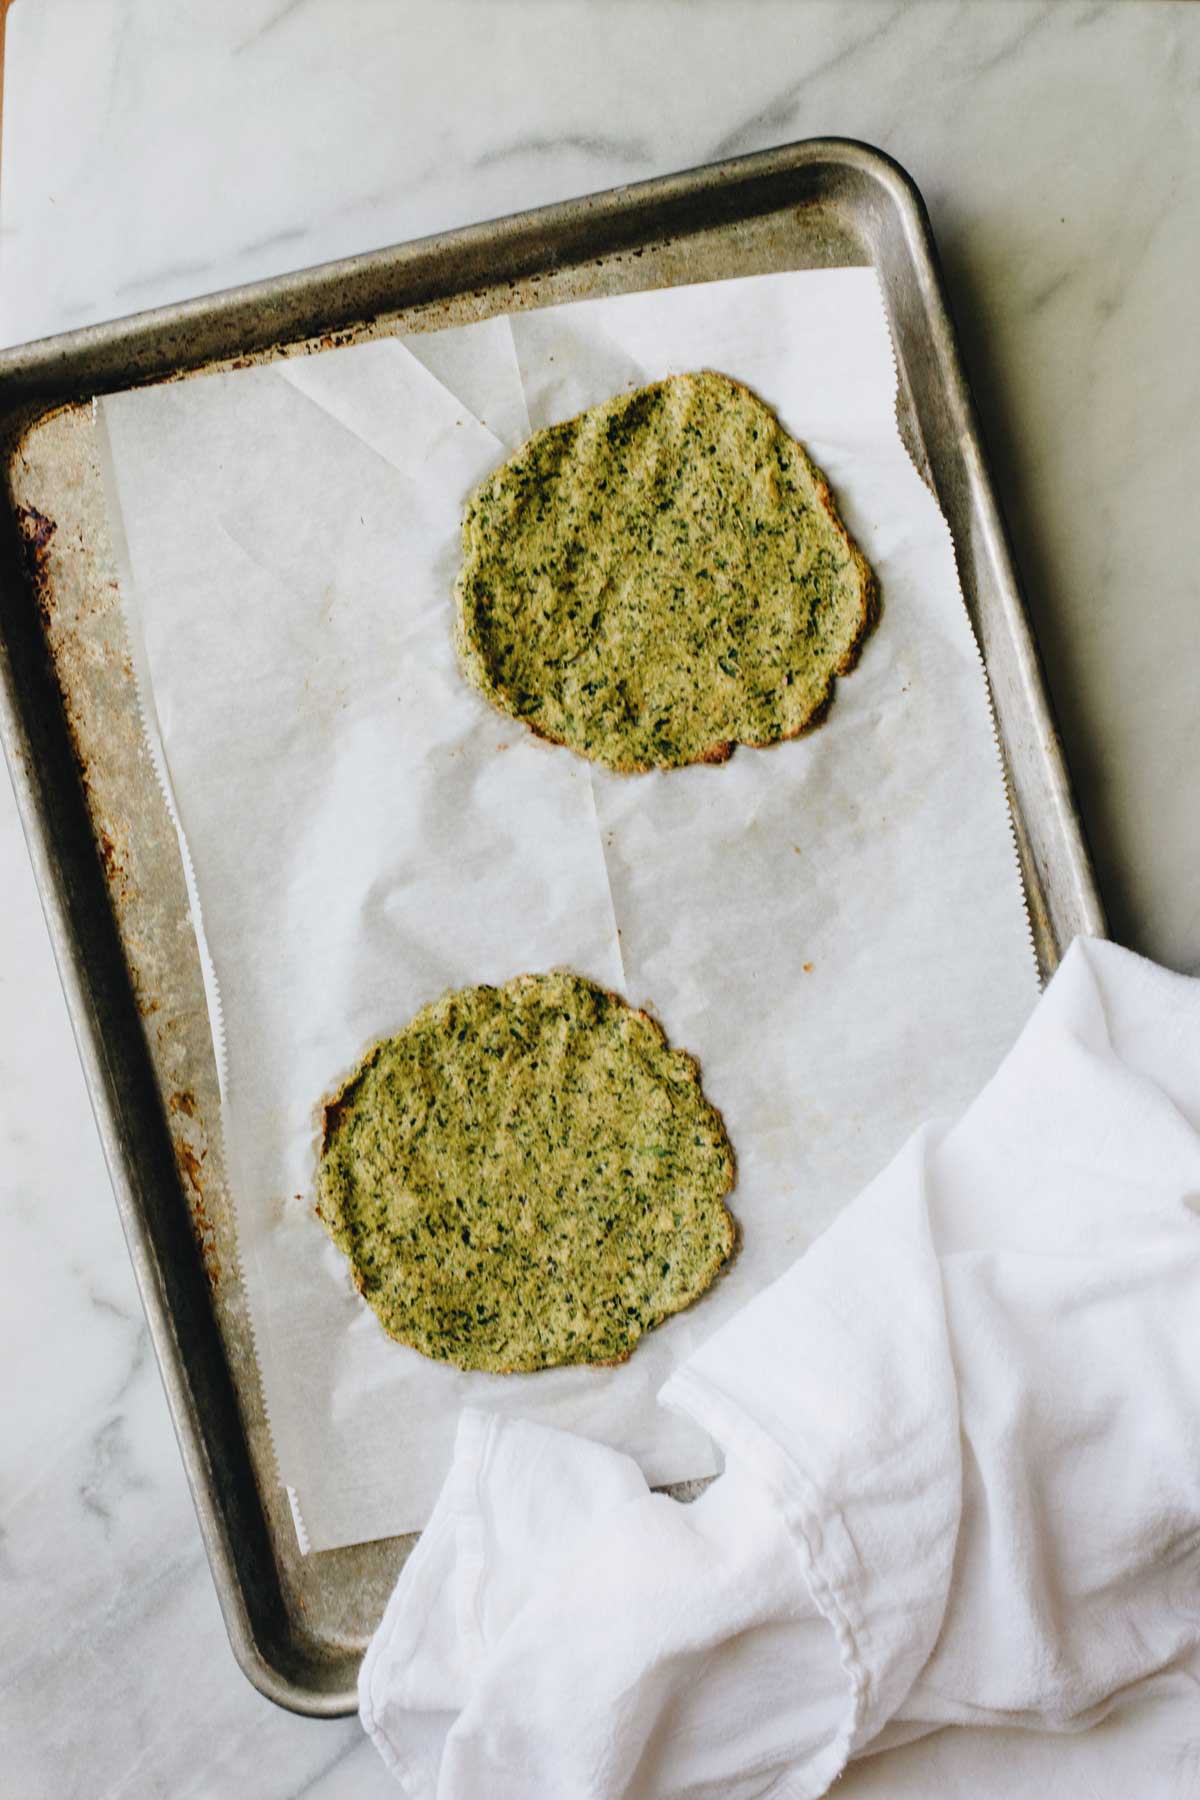
Zucchini Tortillas (No Grains or Dairy!)
Serves eight tortillas

2 cups grated and strained zucchini (about 8 small zucchinis)
2 eggs
1/2 cup almond flour
1/2 cup coconut flour
2 teaspoons oregano
1 teaspoon garlic salt
1/2 teaspoon ground pepper

Preheat oven to 350 degrees.

Stir together grated zucchini, eggs, almond flour, coconut flour, oregano, garlic salt, and ground pepper.

Divide dough into balls and place on a lined baking sheet. Press dough into a thin tortilla shape.

Bake for 20-25 minutes, until lightly browned.


ZUCCHINI TORTILLAS (NO GRAINS OR DAIRY!)
 
Author:
Ingredients
  • 2 cups grated and strained zucchini (about 8 small zucchinis)
  • 2 eggs
  • ½ cup almond flour
  • ½ cup coconut flour
  • 2 teaspoons oregano
  • 1 teaspoon garlic salt
  • ½ teaspoon ground pepper
Instructions
  1. Preheat oven to 350 degrees.
  2. Stir together grated zucchini, eggs, almond flour, coconut flour, oregano, garlic salt, and ground pepper.
  3. Divide dough into balls and place on a lined baking sheet. Press dough into a thin tortilla shape.
  4. Bake for 20-25 minutes, until lightly browned.

 Adapted from Sweet as Honey.

As a friend of mine puts it, I don’t eat desserts, except when I do. I am sort of that way with grains. I dabble in the fruit and vegetable based lifestyle – when I feel like it. Or just when it is fun! Like doing taco night with these tortillas for something new to mix it up. 

READ MORE

Wall Paneling DIY and Colorblock Painting

July 29, 2019

I have wanted to add a little something to our dining room that would be high impact but inexpensive. When I thought of this color blocking paint concept with a little bit of wall paneling I was like YEP THAT’S THE ONE. It has added personality to the room and despite many things that would make me expect the contrary, it has somehow made the room feel BIGGER? I don’t know, I guess some dark paint can do that and make part of the room feel like it’s an endless expanse more or less.

We LOVED this project!

medallion fringe rug | dining table diy | dining banquette diy | wood stoolbrass flush mount light fixture| white dining chairs | sideboard |  mustard lamp (similar) | black lamp shade | ornate chalkboardsilver tray (similar) 

MATERIALS

PROCESS

  1. Create a border around the wall(s) where the board and batten will be applied by nailing strips of the wood up against the ceiling, down corners of walls, above baseboards, and around doorways or windows if necessary. We added strips behind our baseboards to make a seamless transition between the lower border piece and the baseboard. If your baseboards are thicker than the strips, you won’t need to do this. We also added some petite crown molding after this step, which is optional as well.
  2. Mark with pencil where horizontal strips will be attached for reference while nailing in.
  3. Attach the horizontal strips using the brad nails, putting sets of two nails approximately 8 inches apart down the length of the strip. Double check alignment with a level while putting the nails in.
  4. Mark where vertical strips will be attached.
  5. Attach the vertical strips using the brad nails, putting sets of two nails approximately 8 inches apart down the length of the strip. Use a level like in step 3 to double check alignment.
  6. Spackle nail holes and sand once dry. Wipe surfaces with damp cloth to remove dust.
  7. Caulk seams. Tape off border using delicate surface frogtape.
  8. Paint top section.
  9. Re-apply frogtape and paint bottom section. Remove tape!

The impact of this $120 project is HUGE. We love it so much and feel like we arrived at what we were looking for on the walls in the dining room.

We swapped out the rug too with one from our nursery. This new one is a good price and very forgiving for dinner or art messes.

I can’t wait to keep building off of this and the great thing about this feature is the walls look addressed even without hanging any art.

My next thing to do in here would be to get a chandelier for more light centered over the table! But PSA – what we have in the photo is a rare, good looking flush mount fixture and it’s available on amazon!

I have wanted to add a little something to our dining room that would be high impact but inexpensive. When I thought of this color blocking paint concept with a little bit of wall paneling I was like YEP THAT’S THE ONE. 

READ MORE

BUILDING A DIY BASKETBALL BACKBOARD

July 25, 2019

Since moving into our house a few years ago, one of the things we wanted to do was replace the old busted up basketball hoop we inherited from the previous owners. We took down the (really heavy) rusty metal backboard and lived with a lonely pole for a while, as you may have seen in photos previously. The classic crisp white school yard hoop is the look we like, but it turns out those are expensive, so we kept our eyes open for one on the thrifted market. 

When one became available we pounced and made plans to install it. BUT the new (really heavy) metal backboard unsurprisingly proved difficult to lift up 13 feet in the air for an extended period of time. More importantly, the holes in the backboard for connecting it to the pole weren’t in a great position to make things as sturdy as I would want. So, we shifted to our typical strategy when we can’t seem to find the right product to fit our needs – make it yourself. 

Our design ended up very simple, two pieces of plywood glued and screwed together with a couple support pieces of 2 x 8 for 1) the rim and 2) attaching everything to the pole.

MATERIALS

PROCESS

  1. Cut plywood panels identically to size for the backboard. We made ours 36 inches tall and 44 inches wide. 
  2. Cut (1) 2 x 8 piece so the length is the same as the width of the backboard. Cut an additional 2 x 8 piece 12 inches long. 
  3. Glue, clamp, and screw the plywood panels together using the 1 and 1/4” screws. I put screws about 8 inches apart on the edges and used a grid-ish pattern on the interior. 
  4. Sand the edges of the backboard so both panels are smooth and continuous. Sand faces of backboard. Sand all corners to round them slightly. 
  5. Caulk all seams and screw holes on the backboard. 
  6. Paint backboard and 2 x 8 pieces. I did three coats to maximize moisture protection. 
  7. The next part, mounting, will vary depending on how you’re putting up your backboard, but our existing pole was set up so we were attaching our backboard to a flat rectangular piece of metal (I’ll call this the bracket) with four large holes at the corners. I clamped the long 2 x 8 to the bracket, centering it in both directions. Then, on the side of the 2 x 8 opposite the bracket, I used a spade bit to make recesses where the heads of the bolts could sink under the surface of the 2 x 8. Then I drilled holes through the 2 x 8 and attached it to the bracket using bolts, nuts, and lock washers.
  8. Clamp the backboard to the mounted 2 x 8 at the appropriate height so the rim can eventually be attached at 10 feet. Attach the backboard to the mounted 2 x 8 using construction adhesive and the 2 and 1/2” screws, screwing through the 2 x 8 into the back of the backboard.
  9. Clamp the 12 inch 2 x 8 to the back of the backboard in the appropriate position so you can attach the rim through the backboard and the 12 inch 2 x 8. Attach the 12 inch 2 x 8 to the backboard using construction adhesive and 2 and 1/2” screws, screwing through the 2 x 8 into the back of the backboard.
  10. Attach the rim to the backboard using whatever hardware works for your rim, going through the backboard and the 12 inch 2 x 8. 
  11. Caulk remaining screw holes and seams.

As the primary recreational b-baller in our family, I was concerned with how a diy backboard would hold up and how well the ball would bounce off the wood.

After testing it for some time, I haven’t been able to tell the difference in bounce between our hoop and a nice indoor one. IT’S BEEN REALLY FUN to shoot around and our backyard looks much more normal with something attached to that pole.

Since moving into our house a few years ago, one of the things we wanted to do was replace the old busted up basketball hoop we inherited from the previous owners. We took down the (really heavy) rusty metal backboard and lived with a lonely pole for a while, as you may have seen in photos previously.

READ MORE

Copyright © Rachel Schultz 2024

PRIVACY POLICY