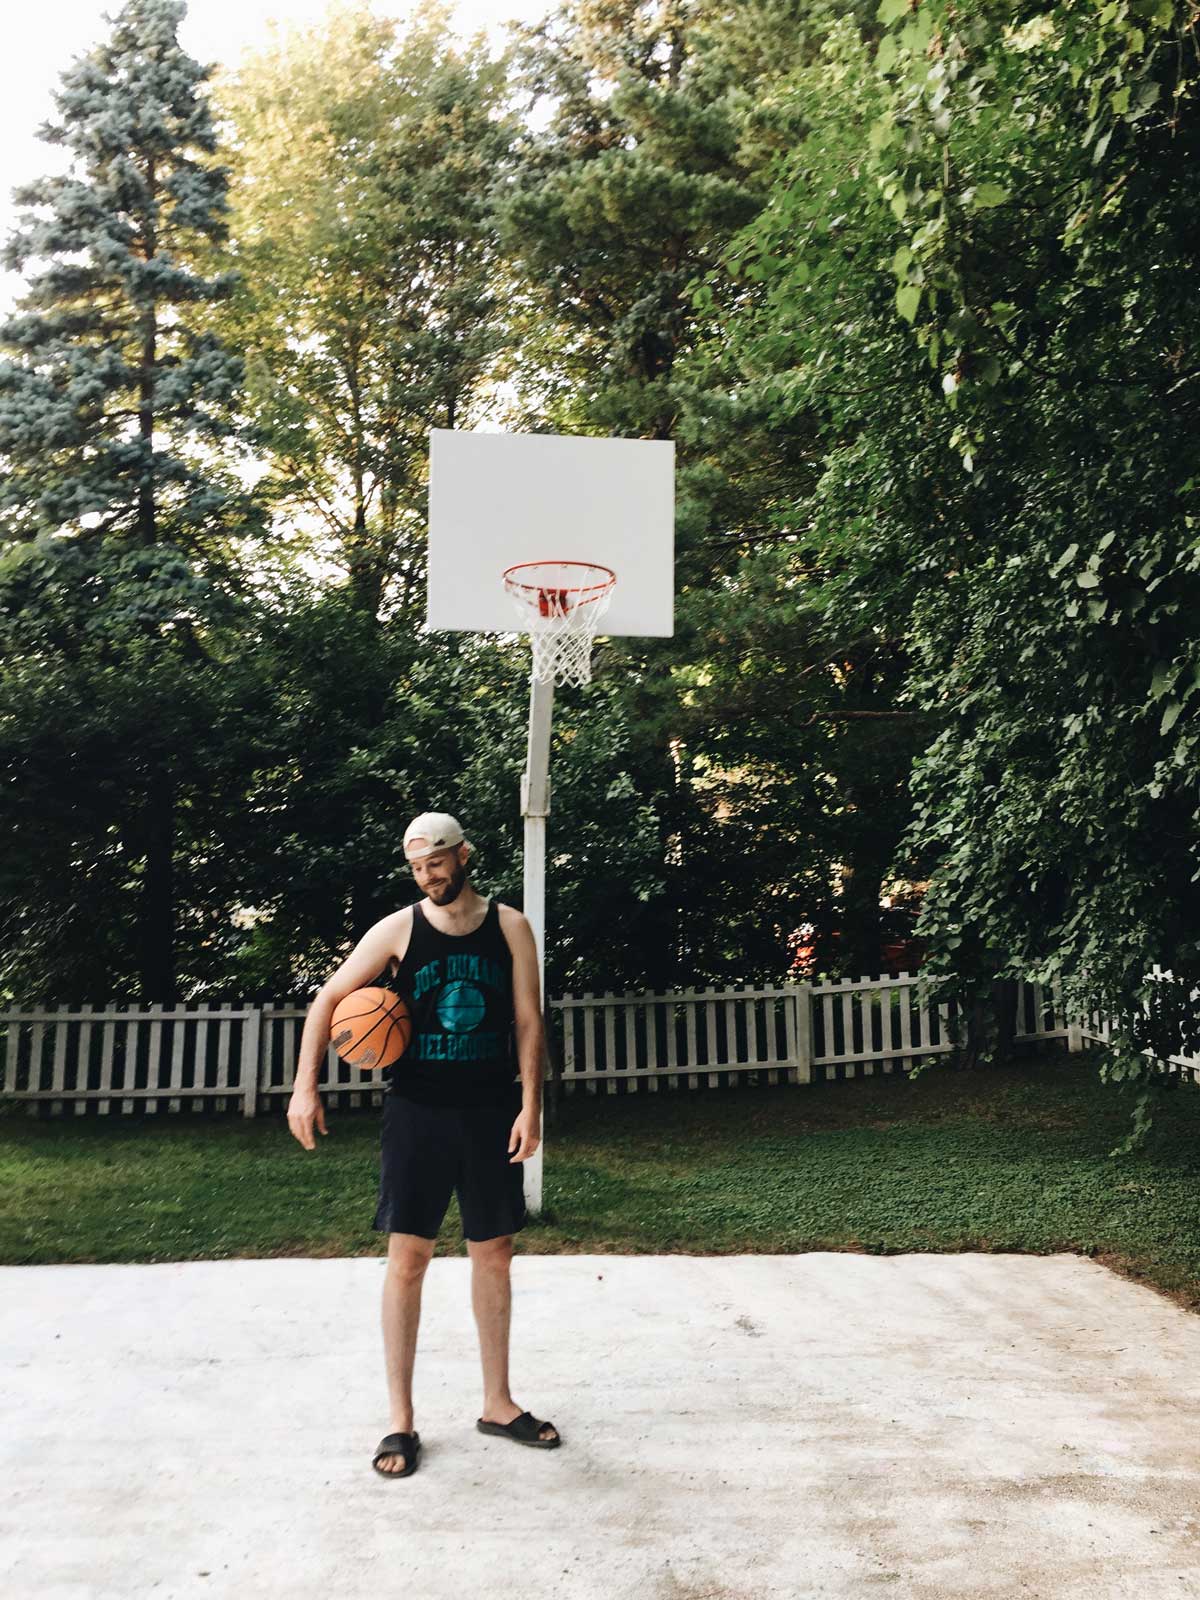
Since moving into our house a few years ago, one of the things we wanted to do was replace the old busted up basketball hoop we inherited from the previous owners. We took down the (really heavy) rusty metal backboard and lived with a lonely pole for a while, as you may have seen in photos previously. The classic crisp white school yard hoop is the look we like, but it turns out those are expensive, so we kept our eyes open for one on the thrifted market.
When one became available we pounced and made plans to install it. BUT the new (really heavy) metal backboard unsurprisingly proved difficult to lift up 13 feet in the air for an extended period of time. More importantly, the holes in the backboard for connecting it to the pole weren’t in a great position to make things as sturdy as I would want. So, we shifted to our typical strategy when we can’t seem to find the right product to fit our needs – make it yourself.
Our design ended up very simple, two pieces of plywood glued and screwed together with a couple support pieces of 2 x 8 for 1) the rim and 2) attaching everything to the pole.
MATERIALS
- (2) 3/4” x 4’ x 4’ plywood panels ($50)
- (1) 2”x 8”x 8’ pressure treated lumber ($8)
- 1 and 1/4” screws ($16)
- construction adhesive ($3)
- caulk ($5)
- 2 and 1/2” RSS Screws ($15)
- hardware for attaching pole and rim, we used different sizes of galvanized hardware ($30)
- porch and floor paint ($30)
PROCESS
- Cut plywood panels identically to size for the backboard. We made ours 36 inches tall and 44 inches wide.
- Cut (1) 2 x 8 piece so the length is the same as the width of the backboard. Cut an additional 2 x 8 piece 12 inches long.
- Glue, clamp, and screw the plywood panels together using the 1 and 1/4” screws. I put screws about 8 inches apart on the edges and used a grid-ish pattern on the interior.
- Sand the edges of the backboard so both panels are smooth and continuous. Sand faces of backboard. Sand all corners to round them slightly.
- Caulk all seams and screw holes on the backboard.
- Paint backboard and 2 x 8 pieces. I did three coats to maximize moisture protection.
- The next part, mounting, will vary depending on how you’re putting up your backboard, but our existing pole was set up so we were attaching our backboard to a flat rectangular piece of metal (I’ll call this the bracket) with four large holes at the corners. I clamped the long 2 x 8 to the bracket, centering it in both directions. Then, on the side of the 2 x 8 opposite the bracket, I used a spade bit to make recesses where the heads of the bolts could sink under the surface of the 2 x 8. Then I drilled holes through the 2 x 8 and attached it to the bracket using bolts, nuts, and lock washers.
- Clamp the backboard to the mounted 2 x 8 at the appropriate height so the rim can eventually be attached at 10 feet. Attach the backboard to the mounted 2 x 8 using construction adhesive and the 2 and 1/2” screws, screwing through the 2 x 8 into the back of the backboard.
- Clamp the 12 inch 2 x 8 to the back of the backboard in the appropriate position so you can attach the rim through the backboard and the 12 inch 2 x 8. Attach the 12 inch 2 x 8 to the backboard using construction adhesive and 2 and 1/2” screws, screwing through the 2 x 8 into the back of the backboard.
- Attach the rim to the backboard using whatever hardware works for your rim, going through the backboard and the 12 inch 2 x 8.
- Caulk remaining screw holes and seams.
As the primary recreational b-baller in our family, I was concerned with how a diy backboard would hold up and how well the ball would bounce off the wood.
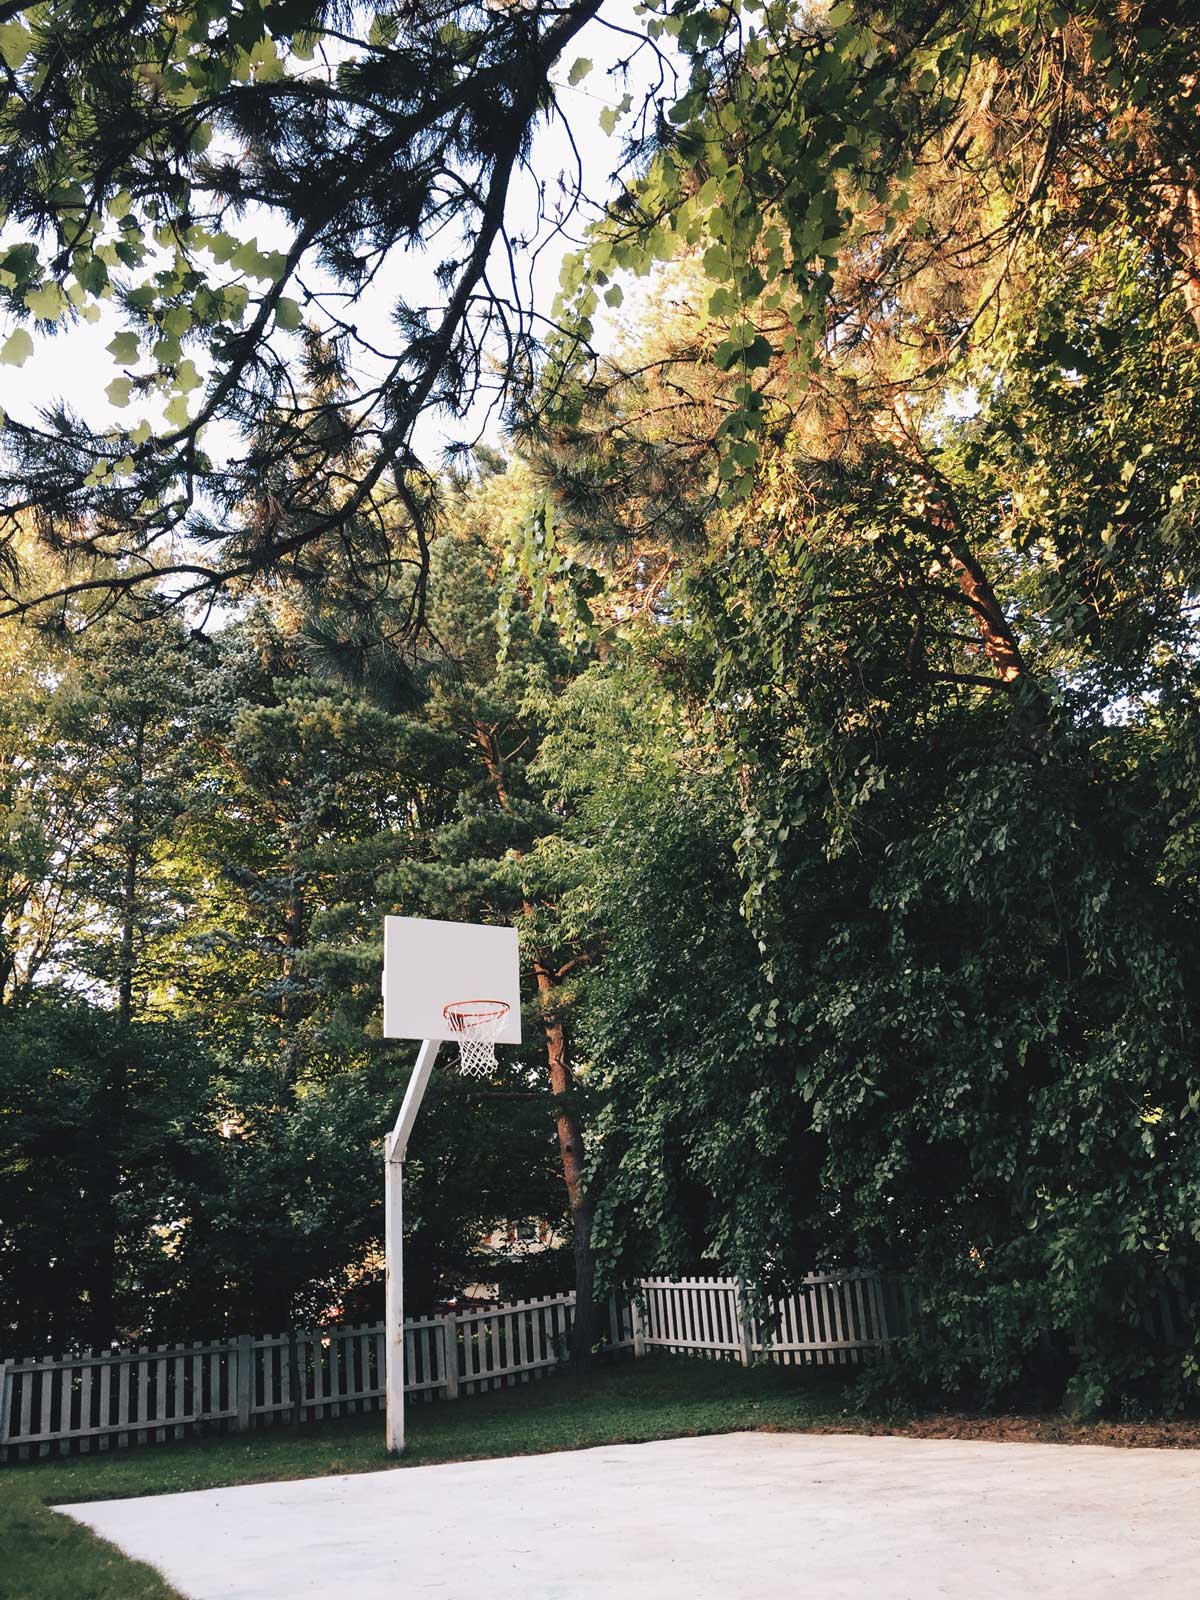
After testing it for some time, I haven’t been able to tell the difference in bounce between our hoop and a nice indoor one. IT’S BEEN REALLY FUN to shoot around and our backyard looks much more normal with something attached to that pole.
Since moving into our house a few years ago, one of the things we wanted to do was replace the old busted up basketball hoop we inherited from the previous owners. We took down the (really heavy) rusty metal backboard and lived with a lonely pole for a while, as you may have seen in photos previously.