Alternate title: This Was So Much Faster Than Shiplapping. When we began work on converting our guest room/junk room into a guest room/nursery, my first step was to bring some character to the walls with classic board and batten. I knew I wanted a quite petite version. This room is about 12 x 10, so something too big would look bulky and disproportionate (and therefore usually bad diy, I-can-tell-you-did-this-yourself because it doesn’t seem original to the house.)
This means it’s that special time when the look I most preferred also happened to be the cheapest. And I mean like, so cheap. One thing I learned from researching and preparing for this project is there are truly one thousand ways to do board and batten. All that variety comes from there being lots of different materials you can use and lots of ways to design the battens and ledge and such.
I think the method I found might be the actual 1) simplest and 2) least inexpensive!
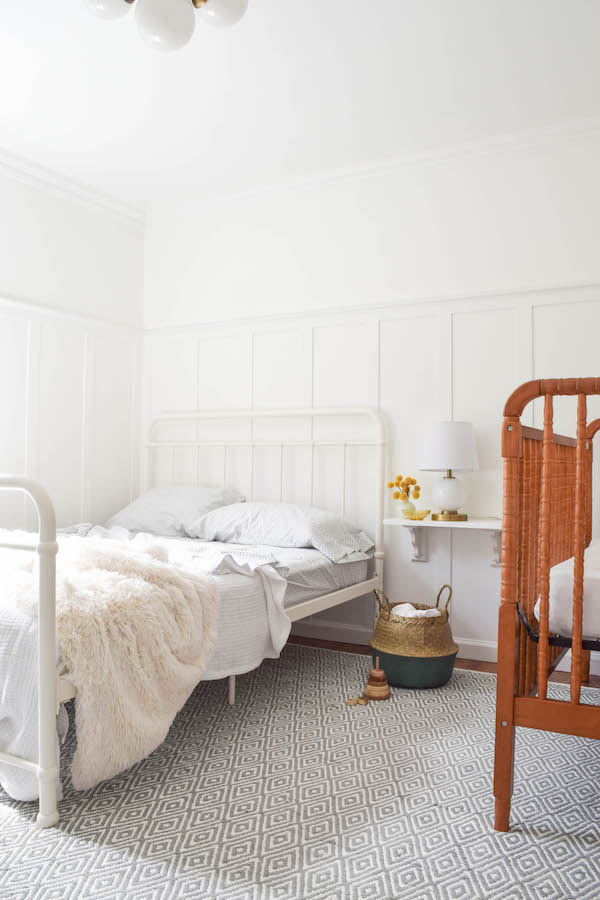
metal bed | black & white bed sheets | white knit blanket | white faux fur throw | gray patterned rug | rug pad | green seagrass basket | wooden stacking toy
The material I chose was 2 x 4 sheets of mdf board. I loved working with it because it was so lightweight. Having only four foot strips made for some extra cutting and nailing because my battens were taller than four feet, but the manageable-ness of working with these small, lighter pieces was such that I could do almost all of this project myself (like, seven months pregnant).
At home depot I had them cut the sheets into 2.5 inch strips. Wider strips (maybe like four inch) looks more rustic, but in here I am going for more of an additional neo-trad architectural detail.
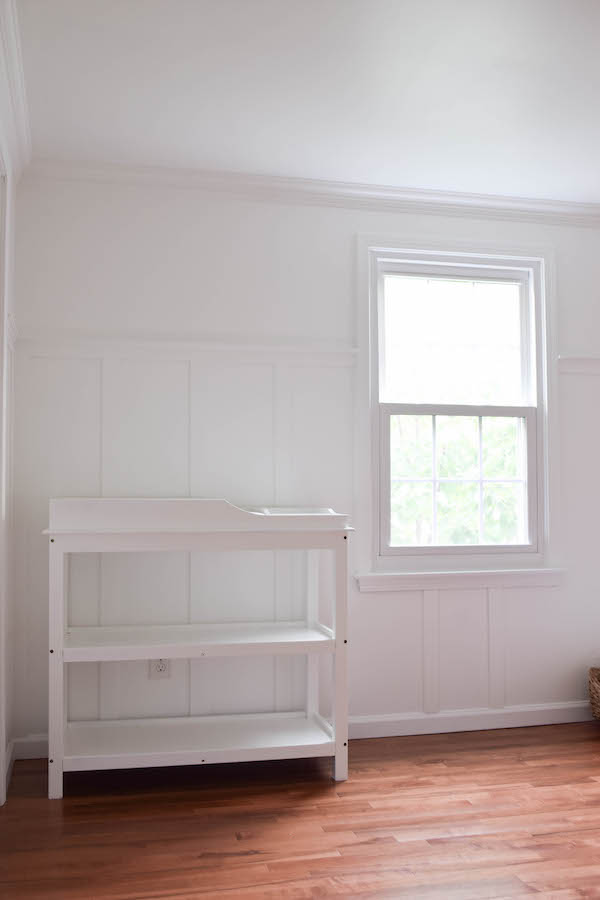
I installed the horizontal top of the battens at about 60″ up from the baseboard with liquid nails and one inch brads from our nail gun. Lots of times you see board and batten about half way up the wall, but I love the look of when it goes about 3/4 of the way up.
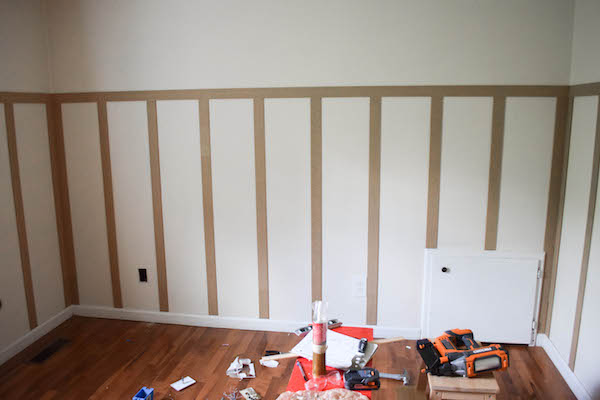
Then I installed the vertical battens down to the baseboard. Another reason I chose this mdf was because it is only 1/4 inch thick, which means there would be no overhang on the baseboards and I would never have to remove them!
Figuring out measurements and spacing was I think the only tricky part of this project. An important concept is that each wall’s battens do not have to be the same width apart. My baseline was twelve inches, and then I would go a little plus or minus for each of those as would best suit the wall’s width. You don’t notice fluctuations like that when the room is complete and it gives you freedom to navigate around obstacles.
The easiest way to do make your calculations is to first install the first and last batten on each wall. If you want a math equation for figuring out exactly how to space your battens, here it is! All of my battens were 2.5 inches wide, so that is where that number comes from in the equation.
batten spacing = (wall width – (width of first batten + width of last batten)) – (number of battens x 2.5) / (number of battens + 1)
You just try plugging different numbers in for “number of battens” variable until you get the closest you can to the batten spacing you desire (in my case, 12 inches). Don’t include the first and last batten in that variable. To give you an idea, our ten foot wall had eight battens.
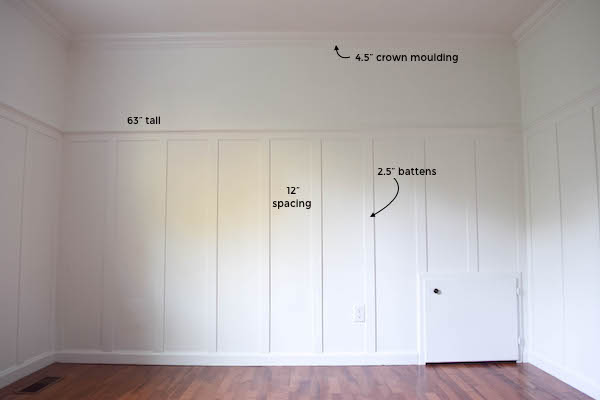
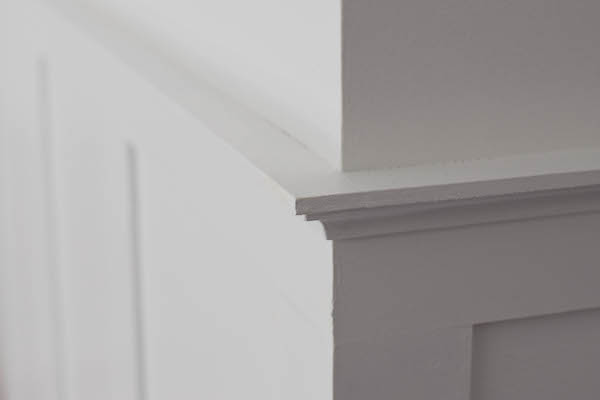
ATTENTION: the mathematics are over now. We placed a line of cove molding level with the top of the original horizontal line of boards (using liquid nails and the nail gun again).
On top of that we put a 1 and 1/8 inch wide piece of mdf for the top ledge. Those pieces we did on our table saw instead of going back to home depot. The mdf does really well cutting smoothly even at home.
After spackling nail holes and caulking, I primed the boards and then covered with three coats of ralph lauren “chalk white” in eggshell. (The walls in our house take so much paint. I don’t know what it is.)
If you do like me and skip covering the whole walls with the “board” part of board and batten (just nailing right into the existing drywall), I recommend using the least sheen possible on paint. Higher glosses make differences in material more noticeable. For us the eggshell looked really good and all the materials appear to match.
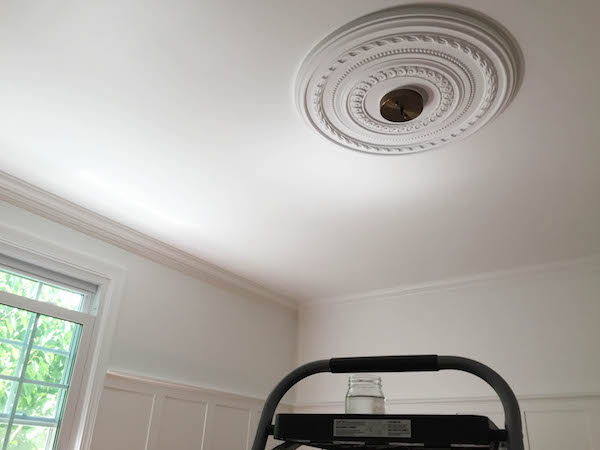
An even coat of pure white paint and some architectural details like the crown and ceiling medallion (love), plus all the little things like: replacing old outlets, putting the light on a dimmer, and removing and patching phone jack outlets made this room a pretty palette for us to build on.
In summary, the things that made this version of board and batten so easy and inexpensive were:
- Using mdf board, which is lightweight and inexpensive
- Using battens only 1/4 inch thick so the baseboards did not need to be removed
- Skipping a horizontal line of board installed above the baseboards (as people include with some styles)
- Skipping nailing flat boards into the drywall under the battens.
- The mdf board not needing to be caulked, except at corners and where it touches the cove moulding
I love the slim profile of this batten and the dimension it still gives. Same with our living room millwork, I expected this treatment to make the room seem smaller and am again shocked with how the space actually feels bigger and with so much more visual interest. It must be that added depth and continuous color.
You can see more of the nursery and guest room here!